Diablo
Diablo 3 Greater Rift Mechanics Explained – Resource Guide
Jul
Delve into the intricate mechanics of Greater Rifts (GR), the pivotal component of Diablo III’s Endgame, as we uncover the profound significance they hold!
| Torment Level | Greater Rift Level |
| 1 | 10 |
| 2 | 13 |
| 3 | 16 |
| 4 | 19 |
| 5 | 22 |
| 6 | 25 |
| 7 | 30 |
| 8 | 35 |
| 9 | 40 |
| 10 | 45 |
| 11 | 50 |
| 12 | 55 |
| 13 | 60 |
| 14 | 65 |
| 15 | 70 |
| 16 | 75 |
Unlocking a Greater Rift necessitates acquiring a Greater Rift Keystone from Nephalem Rifts. As the level of the cleared Nephalem Rift escalates, so does the quantity of average keys bestowed upon you as a reward. When conquering Torment 16, there is an equal chance of receiving either 3 or 4 keys. By donning the esteemed Cain’s Destiny set, you can enhance your average key count by a remarkable 25%.
Click on the Nephalem Obelisk adjacent to Orek in the bustling town to unveil a GR and opt for a Rift level. Your journey into unlocking the initial tiers will be accomplished by conquering Nephalem Rifts on specific levels of difficulty.
Furthermore, as you progress all the way up to GR150 (the ultimate limit), you can unlock new tiers by successfully conquering the Greater Rifts. The key to conquering a Greater Rift lies in defeating monsters until you achieve 100% progression, followed by defeating the formidable Rift Guardian (also referred to as RG) within a 15-minute timeframe. The remaining time can be easily monitored through a timer positioned on the right side. Depending on your swiftness in completing the GR, you will unlock higher tiers such as +1 (for completing the rift in 10:00-15 minutes), +2 (for completing it in 5:00-9:59 minutes), or +3 (for completing it in 0:00-4:59 minutes).
The Leaderboards eagerly await your triumph as you conquer each Greater Rift within the allotted time. Should you find yourself among the elite top 1000 players in any specific category, your name will grace the prestigious in-game Leaderboards. Prepare to bask in glory across various categories displayed on these hallowed boards.
In the event that you successfully defeat the Rift Guardian within the time limit of a Greater Rift, all your transmogrifications, gear, skills, and passives will be captured and displayed on the Leaderboards, granting you a chance to make it to the prestigious Top 1000. Your remarkable achievement will be visible to everyone, with a complete showcase of your setup, excluding your loyal follower. Nevertheless, this hasn’t always been the prevailing norm.
Starting from the implementation of Greater Rifts in the game up until Season 4, players were only able to see the transmogrification of their setup while the actual build remained concealed. This decision was made to promote transparency, but it also brought about certain issues. Many individuals would mindlessly replicate the setup of the top-ranked player without comprehending the mechanics behind the build or facing difficulties due to insufficient Paragons. Nevertheless, this feature proves valuable in providing a basic understanding of the builds used by the highest achievers, particularly for those who are new or returning to the game.
Loot is a rare find amidst the wreckage left by fallen monsters in Greater Rifts. The alluring allure of gold-generating enchantments, like the Boon of the Hoarder or Goldskin, are rendered powerless within these treacherous depths. Fear not, for salvation lies in the hands of the victorious, as the Rift Guardian’s demise bestows upon you an opulent bounty beyond compare.
| GR tier compared to Gem’s rank | Chance of upgrading |
| +10 or higher | 100% |
| +9 | 90% |
| +8 | 80% |
| +7 | 70% |
| +6 | 60% |
| +5 | 60% |
| +4 | 60% |
| +3 | 60% |
| +2 | 60% |
| +1 | 60% |
| +0 | 60% |
| -1 | 30% |
| -2 | 15% |
| -3 | 8% |
| -4 | 4% |
| -5 | 2% |
| -5 to -15 | 1% |
| -16 or lower | 0% |
As you venture into the depths of the Rift, the formidable Rift Guardian bestows upon you a treasure trove of riches. Gold, Gems, crafting materials, and Blood Shards fall in abundance, their quantity growing in harmony with the escalating Greater Rift tier. Moreover, the Rift Guardian graciously relinquishes up to a dozen items of diverse qualities. With each step towards greatness, the average quality of these items ascends, reaching unprecedented heights around GR100, where almost every item bestowed is of legendary or set status. Beyond this threshold, the progression of item drops reaches a plateau, bestowing a constant stream of formidable artifacts.
In the event that you have yet to collect all the Legendary Gems, rest assured that the Rift Guardian will bestow upon you one of the missing Gems. The initial gem obtained through this method is none other than the renowned Bane of the Powerful. However, it is worth noting that the highly coveted Legacy of Dreams boasts a considerably greater likelihood of dropping compared to its gem counterparts, often revealing itself shortly thereafter. In all other cases, the order in which the gems appear is entirely arbitrary.
Upon successfully finishing a Greater Rift within the allotted time, an opportunity arises to enhance the power of your Legendary Gems through an encounter with Urshi, who materializes beside a randomly chosen companion. Initially, you are granted three attempts to upgrade your gems, with an additional chance bestowed upon those who manage to avoid death throughout the entirety of the rift. Furthermore, a supplementary opportunity presents itself if you choose to invest Gold in empowering the rift before embarking upon it. These upgrade attempts can be utilized on any gems within your possession, whether they reside upon your character or within your shared stash. The likelihood of a successful upgrade is contingent upon both the Greater Rift tier and the rank of the Gem itself. For precise probabilities at each level, please consult the provided table.
Once the Rift Guardian has been vanquished (and your Gems have been successfully upgraded), venture into the town and have a chat with Orek to bring the quest to a satisfying conclusion. This act will seal the Greater Rift and reward you generously with a substantial bounty of Gold and Experience, which increases exponentially as you conquer higher tiers of the Rift.
With each new personal solo achievement, a thrilling discovery awaits – an unlocked threshold for carrying a greater number of Blood Shards. Initially, you are granted a modest cap of 500, but as you conquer higher levels of Greater Rifts, your capacity grows by an exhilarating +10 Blood Shards. Just imagine the possibilities when you successfully conquer the formidable challenge of GR100 solo – an unprecedented cap awaits you, ready to be seized.
A sum of 500 as the base value combined with the product of GR100 multiplied by 10 will result in a grand total of 1,500 Blood Shards.
Rewrite: Embarking on a brand-new journey or starting afresh with a new character brings forth an opportunity to lay hands on the ultimate treasures within the game – the Primal Ancients. However, to attain this coveted status, one must prove their mettle by conquering the formidable challenge of a solo GR70! Moreover, triumphing over the Herculean task of a solo GR75 will not only grant you the keys to Torment 16 difficulty in Public Games but also serve as a litmus test to ensure your worthiness to join a public group commensurate with your formidable power.
The consequence of death within a Greater Rift is the added duration it takes to revive: Upon the initial fatality, you have the ability to revive instantly without any time loss, but subsequent deaths will incrementally increase your revival timer by +5 seconds, up to a maximum of 30 seconds. The ticking of the Greater Rift timer, set at 15 minutes, will persist during your revival period. Nevertheless, there is a strategic maneuver to counteract this mechanic, involving the utilization of the “Resurrect at Checkpoint” button to instantly revive at the entrance of the current floor within the Greater Rift.
The inception of the GR150 Cap marked the advent of the Greater Rift System, designed to embrace boundless scalability. For an extensive period, this held true, as the theoretical limit seemed unattainable. Yet, the persistent powercreep inherent in each subsequent patch eventually bestowed players with the ability to effortlessly conquer the loftiest Rifts conceivable.
Nowadays, it has become customary for GR150 to be conquered within the initial days of a new season, and for it to be swiftly cleared within a matter of minutes during the final season push, thus giving rise to the term Time Attack.
Blizzard has firmly declared that the steadfast Greater Rift Cap of 150 shall remain unaltered, directing their efforts towards the infusion of fresh builds and refining the existing ones, thus augmenting the tapestry of diversity within Diablo III’s endgame. Explore the complete blogpost here to learn more.
An important note, especially for those of you who have been looking for this answer: we have no plans to increase the Greater Rift level cap beyond 150. As to why, the short answer is because it causes more problems than it solves.
The long answer is that continuing to expand the end game through additional Greater Rift levels hasn’t been the healthiest approach for Diablo III. At this late stage of game development, we’d prefer to focus on making the current game the best, and most varied, experience it can possibly be. We hope to accomplish this by (1) continuing to add new builds and (2) improving existing builds that have fallen behind. Maintaining a cap, and even backing away from it a little, will allow us to focus on greater gameplay variety.
As you ascend the levels of Greater Rifts, the challenges become increasingly formidable, yet the rewards grow exponentially. With every step you take, the multiplier for difficulty and bounty amplifies.
As you embark on your journey through the realms of Greater Rifts, prepare yourself to immerse in challenges beyond level 70. Witness the magnificent scaling unfold before you in the following manner:
As more players join the Greater Rift, the monster life undergoes a remarkable surge of 100%. However, the monster damage remains unaffected. Despite this daunting increase, the potential for incredible group synergies and combinations, along with the advantageous Strength in Numbers buff, far surpasses the gain in monster life. Feel free to refer to the complete Multiplayer scaling for further details.
Chronicles of the Past and Tests of Time.
Once upon a time, when Greater Rifts made their grand entrance, one had to embark on a thrilling bounty-hunting adventure to unlock the mystical Torment Rifts using extraordinary keys. And thus, the journey continued, as brave souls delved into the depths of Torment Rifts to obtain the elusive Keystone of Trials from the formidable Rift Guardian, granting them passage to the enchanting Trial Realm.
The Trial Realm, a quaint domain, beckoned players to vanquish hordes of monstrous creatures within a designated timeframe. The spoils of victory were bestowed upon those who conquered waves of escalating difficulty, gracing them with a coveted Greater Rift Keystone. This distinct approach to gameplay birthed a captivating META centered solely around the enigmatic Trial Realm.
The year 2015 marked a significant shift for this system, as Season 4 brought about a transformation that led to the creation of the Diablo III endgame experience we are familiar with today. This alteration was necessary since players were previously required to invest a substantial amount of effort in order to fully immerse themselves in the exhilarating realm of Greater Rifts.
A plethora of diverse maps unpredictably materialize upon the unveiling of a Greater Rift. In essence, players seek out expansive map designs that facilitate the accumulation of an abundance of low-level foes, all the while inflicting damage upon powerful adversaries and luring them towards their ultimate demise. Furthermore, the most exceptional Rift layouts boast numerous Pylon locations, allowing for versatile utilization. Below is a comprehensive inventory of all potential maps, accompanied by brief descriptions, ranked according to their average performance. Maps belonging to the esteemed Orek’s Dream assortment are distinguished in a captivating shade of blue.
Greater Rift Map Pool
The Season 26 Patch 2.7.3 Update Unleashed!
Expand your knowledge on Advanced Pushing Techniques with this captivating 80-minute video.
Monster Sets
Once the progression hits the glorious 100%, behold the awe-inspiring emergence of the Rift Guardian, the ultimate embodiment of power within the Greater Rift. With an equal measure of resilience, each Guardian stands tall as an Elite, yet distinct in their monstrous nature. Prepare to face a grand ensemble of 25 Rift Guardians, each harboring a myriad of diverse and unparalleled mechanics.
Dive deeper into the realm of knowledge by exploring our comprehensive Rift Guardian Mechanics Guide crafted by the ingenious mind of Chewingnom. Unleash the power of Force Teleport, master the art of optimizing Bane of the Stricken stacking, and outmaneuver their formidable array of abilities.
Pylons, an essential element within Greater Rifts, hold significant importance as they possess the power to determine the outcome of an endeavor, whether it be a mere attempt or a successful advancement. Prepare yourself with the following knowledge about Pylons:
Pylon Types.
Achieving a top spot on the Leaderboards often demands an extensive session of GR fishing (i.E. Resetting until a favorable run is obtained). The endeavor to reach a new personal record or climb the ranks on the leaderboard is aptly referred to as pushing (and we even have a comprehensive guide on that, by the way!).
In search of the ultimate map, one seeks a combination of the finest terrain and formidable creatures, often accompanied by a Conduit Pylon and a formidable boss that complements their unique abilities. Occasionally, the quest for perfection delves into the realm of chance, where seasonal themes (S19, S21) and elite affixes such as Missile Dampening come into play. Behold, a compilation of the customary elements of randomness that dictate the art of Greater Rift fishing, allowing us to construct our very own realm of dreams with an approximate estimation of likelihood.

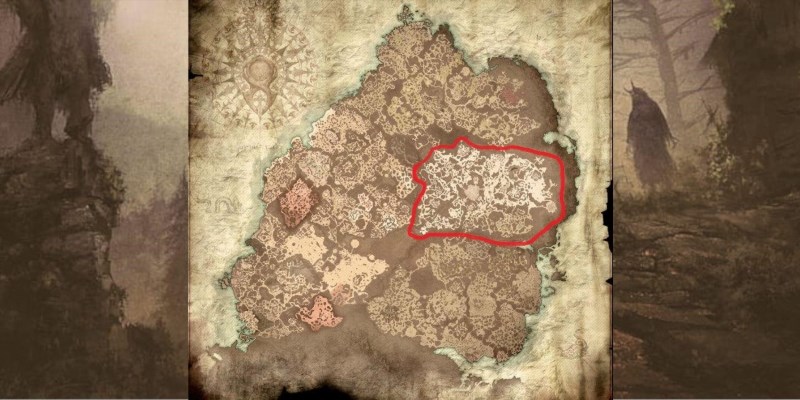
Searching for a top-notch Rift Tileset? Look no further than the mesmerizing Festering Woods, boasting an impressive 10% probability of encountering it.
For an optimal Tileset Layout, the ideal choice on Festering Woods would be the exquisite 4 corner layouts, presenting a captivating 20% probability.
3. To unleash your inner power, equip yourself with mighty Mobtypes like Transformers or Lacuni Slashers. There’s an electrifying 30% possibility of total domination.
To increase your chances by 33.3%, it is essential to have a generous population of trash monsters or a substantial number of particular creatures such as Unholy Thralls or Wretched Mothers.
5. Seek out exceptional Elite Affixes: Avoid the perplexing Wormhole or formidable Juggernaut Elites if possible.~ With a mere 20% probability.
6. Opt for Exceptional Warriors: Aim for a predominantly close-combat force of Elites (as they typically remain within reach and obediently trail behind) or conjurers, matriarchs, repugnant hives, and larvae to generate extra advancement and/or inflict widespread devastation. Probability stands at approximately 15%.
Input: 7. Ideally, you aim to conquer the Rift within 1 to 3 attempts in order to minimize time spent relocating and starting a new challenge.~ Embrace the challenge within 1, 2, 3, and even 4 attempts.
8. Acquiring excellent Pylons is crucial: Optimal selection would include the Conduit Pylon for the Rift, the Power Pylon and/or Speed Pylon for the Rift Guardian. When tackling a Rift solo, the Shield Pylon proves to be highly beneficial for most builds throughout the duration of the Rift. Approximately a 25% chance of finding it.
Aim for achieving 100% progression on a single map to avoid wasting time on loading screens, travel, and monster grouping. However, it is also quite feasible and equally satisfying to attain around 80% progression on one map and conclude with a Conduit Pylon on the subsequent map. This can be accomplished by following steps 1, 2, 3, and 4.
10. When it comes to your build, finding the ideal Rift Guardian is crucial. You can opt for a steadfast and unwavering single-target adversary or a fierce melee opponent accompanied by a horde of minions, which works wonders in procuring those desirable Oculus Rings. The odds of encountering such a formidable foe stand at an impressive 24%.
The remaining factor to consider is a mere approximation of the likelihood of experiencing an extraordinary Rift scenario.
The product of multiplying 0.1, 0.2, 0.3, 0.333, 0.2, 0.15, 0.25, and 0.24 is equal to a minuscule percentage of 0.00143856.
Imagine finding that one in a staggering 69,000 Rifts, the epitome of perfection. But let’s be real, a flawless Rift isn’t necessary to reach the top ranks; it’s merely a hypothetical ideal. On average, you can anticipate acquiring a highly commendable Rift that encompasses the majority of these random factors every 50 to 100 keys.
Greater Rifts, with their heavy reliance on RNG, encompass a significant aspect of the game. Achieving a commendable position on the Leaderboard demands extensive fishing and unwavering determination from players. While there is room for notable enhancements in the Greater Rift cap system and the element of randomness, it is evident that considerable progress has been made since its inception, resulting in tremendous improvements. Ultimately, Greater Rifts serve as an exceptional tool for endgame content, providing enjoyable experiences both when embarked upon solo and when engaged in group play with companions. May the blessings of RNGsus be bestowed upon you!
Crafted by the ingenious mind of Rob, enhanced by the insightful contributions of Chewingnom, and brought up-to-date by the talented wudijo.