Game
Evil Mad Scientist Laboratories
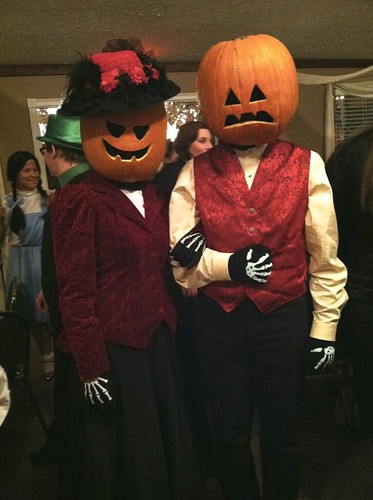
Throughout the night, these were the constant echoes that reached our ears again and again:
Wow, are those pumpkins for real? Goodness gracious, those pumpkins are absolutely genuine!
Yep.
It turned out to be unexpectedly challenging, not to mention surprisingly heavy. Nevertheless, here’s the step-by-step guide to accomplish it.
Initially, the pursuit of retail therapy.
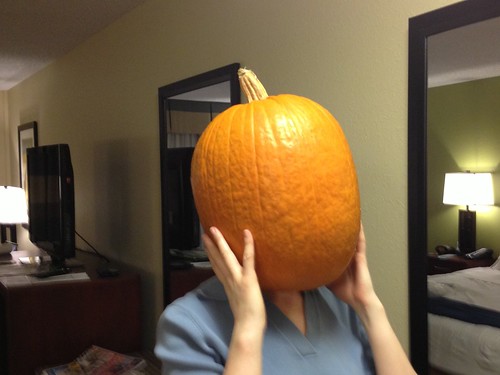
Planning ahead is crucial for this costume to work its magic. Firstly, you must locate a pumpkin that can comfortably fit over your head. This entails finding one that is noticeably larger than your head, with a matching aspect ratio to your head shape. Ideally, the pumpkin should be taller than it is wide, catering to the majority of individuals. However, it’s important to consider the weight of large pumpkins, as they can be incredibly heavy. To ensure maximum comfort during extended wear, it is recommended to select a pumpkin that is just big enough to serve its purpose.
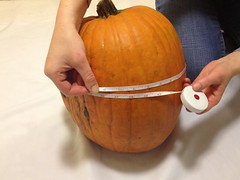
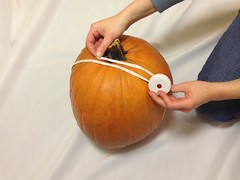
The ideal pumpkin will have a shape reminiscent of a human head, with a slightly greater height than width. To determine the appropriate size, a measuring tape made of fabric can be utilized. As a general guideline, measure the circumference of your head by starting from the tip of your nose and going around the back, then add 12 inches to establish a suitable starting point. (This essentially takes into consideration the width of your head along with two inches for the thickness of the pumpkin’s shell.)
Once you’ve obtained your estimations, bring along your fabric measuring tape when you venture out for shopping. Discovering the ideal pumpkin might entail multiple visits to various pumpkin vendors, and it’s preferable to do so while the jack-o-lantern selection is still plentiful. Waiting until the eleventh hour before Halloween will jeopardize the chances of finding suitable pumpkins for sale. Additionally, it’s worth noting that not all pumpkins possess identical interiors. Opt for pumpkins that are fresh (without any signs of decay or sponginess) and preferably on the lighter side compared to others available. It’s also wise to consider acquiring a few promising pumpkin contenders to work with. We ended up carving more pumpkins than required and were appreciative of having extra options to determine the perfect fit for each of us.
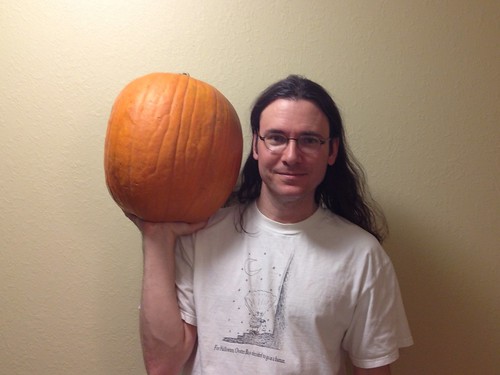
In our quest, we discovered that a minimum circumference of approximately 36 inches was necessary for our own craniums. However, when it came to the pole-to-pole measurement, it proved beneficial to have a few extra inches—around 40 inches did the trick. Naturally, individual head sizes may differ.
And now, it’s time for the intricate art of carving.
The art of pumpkin carving involves two distinct phases: excavating the shell and sculpting intricate facial details. For optimal results, commence the carving process and accomplish the hollowing phase a day prior to donning your costume. This allows the pumpkin to breathe and release any residual aroma. As for the face, it is best to add it right before you showcase your masterpiece, ensuring the features emanate a vibrant and crisp appearance.
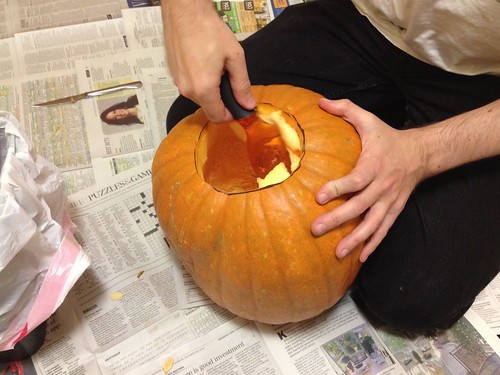
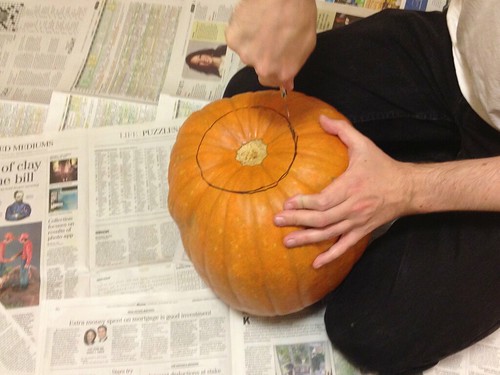
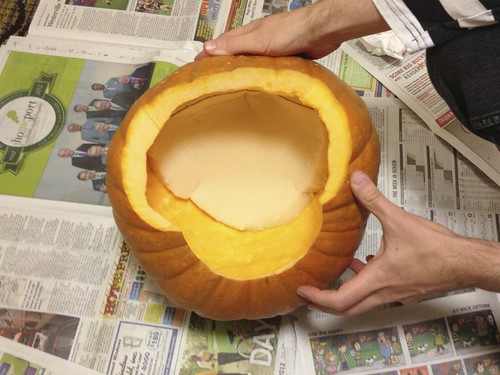
Embark on the hallowed journey by tracing a circle, just a tad bigger than your neck, onto the pumpkin’s base, and skillfully carve it out. Utilize the power of serrated steak knives for this task, as they work wonders. Proceed to scoop out the majority of the pumpkin’s innards from the opening at its base.
Here comes the challenging and crucial step: Carve out the pumpkin’s outer layer to lighten the load and create more breathing space (pun absolutely intended) within.
Various implements can be employed for this purpose, spanning from inflexible spoons to knives and melon ballers. A remarkable instrument for achieving sleek internal incisions is this variant of melon scoop. Additionally, the two most exceptional utensils we have stumbled upon for the ultimate refinement of the inner partitions are butter curlers and this specific ice cream scoop, forged from unyielding steel, effortlessly sculpting strips of inner pumpkin shell akin to the smoothness of butter.
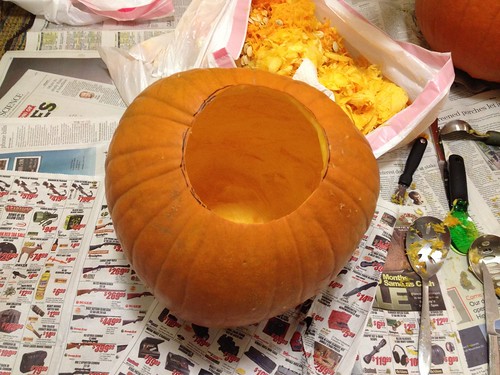
Achieving a shell thickness of approximately ¾ – 1″ should be well within your reach. Remember to pay attention to the interior top of the pumpkin and thin it out as well. If the weight still feels burdensome at this point, feel free to further reduce the thickness to around ½ – ¾” on the walls.
Carving out the perfect shape.
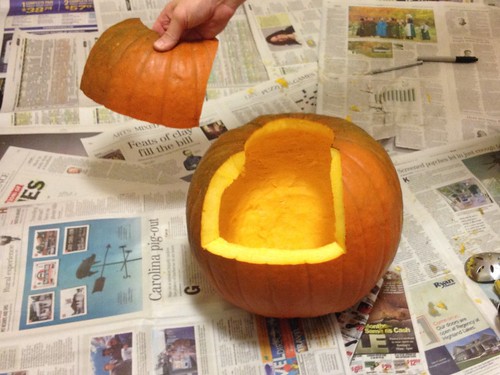
To ensure a perfect fit for your head, it is necessary to carve out a section from the pumpkin’s lower back quadrant. You have the option to either remove and discard this portion or preserve it for reattachment using bamboo skewers after placing the pumpkin on your head.
To remove a section from the “rear,” you must first designate the sides that will serve as the front and back. Typically, the flattened or uneven surface of the pumpkin that was in contact with the ground during its growth is a suitable choice for the backside.
Once you’ve chosen the pumpkin’s face, carefully outline the area at the back, ensuring it’s wide enough for your head to pass through. Opt for precise and straight cuts, creating a broad surface that will be easily reattached in the future.
Subsequently, the examination for suitability commenced.
At this point, the interior of your pumpkin may exhibit a considerable amount of moisture, prompting the use of towels or paper towels to absorb any surplus dampness present on its surfaces. Additionally, it would be wise to shield your head (whether it is adorned with hair or lacking it) from direct contact by donning a shower cap or covering it with a plastic bag (excluding the entire head).
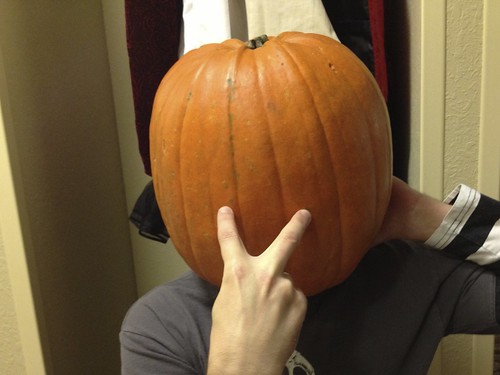
When attempting to cover your head with a snug shell, exercise caution as it may pose a safety risk. Take a leisurely approach, prepared to retreat if it becomes apparent that the fit is too tight or if breathing becomes difficult. Additionally, it is crucial to have a companion nearby to lend assistance in case any mishaps occur.
Discovering the perfect pumpkin may require a quest through several candidates, and your chosen gourd will undoubtedly benefit from some refining and sculpting to enhance its overall comfort. Ensure that your neck enjoys ample space for mobility, guarantee adequate airflow, and allow your jaw to move effortlessly.
Fluffing the interior.
To safeguard the crown of your head against the pumpkin’s weight, a layer of padding is necessary. Initially, we contemplated intricate interior linings that would serve as both a moisture shield and a means to firmly hold the pumpkin, but ultimately, a humble foam cushion proved more than adequate.
Carve out a slice of foam rubber, like a cozy egg-crate mattress topper. Nestle it snugly into the pumpkin’s crown and give it another trial run. In case the cushioning falls a tad short (weightier pumpkins often demand extra TLC), incorporate an additional segment.
Now, it’s time to eliminate the padding and, if it’s there, the back piece of the pumpkin. Set aside both parts and let your pumpkin air dry for a couple of hours, and if possible, throughout the night, in preparation for wearing it.
Final carving.
Just before you decide to don the costume, you can complete the final carving. Swap out the padding, position the pumpkin atop your head, and securely hold the back piece in place (if applicable) to determine the ideal placement for the eye holes. You can accurately indicate their location by extending your fingers towards your eyes from the exterior of the pumpkin. Surprisingly, even with an amusing object on your head, this method works quite well. Ask your friend (the one who ensures your safety from suffocation) to mark the spots with a dot using a marker. For optimal outcomes, repeat this process a few times to obtain a variety of markings.
Begin the process by utilizing either a knife or an apple corer to create preliminary punctures in the designated eye spots, allowing for subsequent adjustments if necessary. Once you’ve completed a trial fitting with these initial eye perforations, proceed to outline the desired expression on your jack-o-lantern’s visage and delicately carve the intricate finishing touches.
When considering utilizing the rear shell of the pumpkin, affix the pumpkin’s posterior fragment and secure it in position by inserting bamboo skewers at various spots. Partially withdraw them, ensuring their readiness for insertion upon wearing it on your head.
Embracing the darkness.
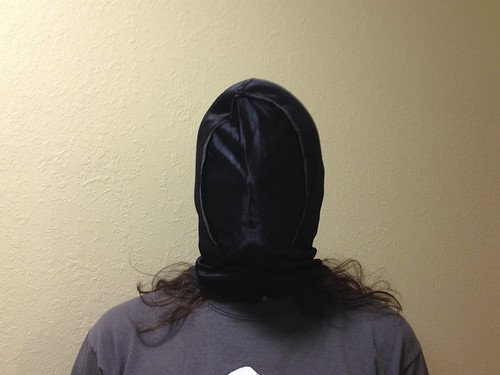
To truly heighten the eerie factor of any exceptional “monster” ensemble, it is imperative to conceal all traces of human skin. Within the realm of Halloween costume emporiums, one can readily find a sinister “unseen” disguise, comprising a hood adorned with a pitch-black mesh screen that allows for limited visibility. However, it is worth noting that these masks often fall slightly short of completely enveloping the neck region.
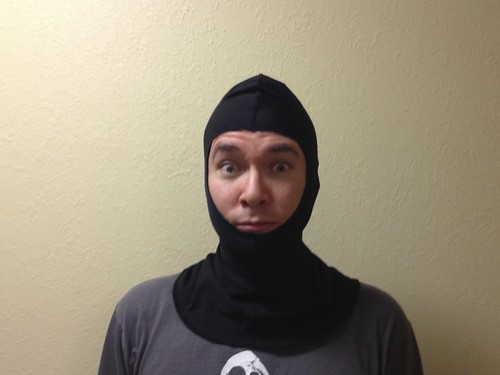
The neck problem was effortlessly resolved by this lycra hood, available at scuba shops.
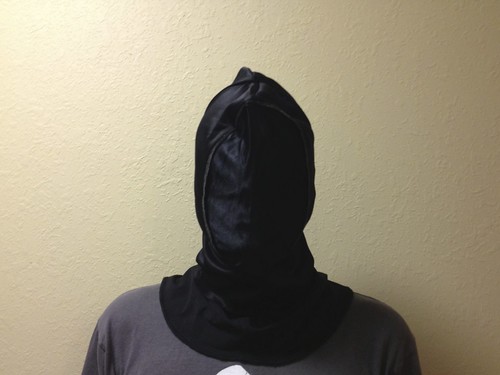
Paired with the hood, it provided complete neck coverage that seamlessly blended with any collar, while offering a clever disguise beneath the jack-o-lantern. Additionally, a cunningly crafted slit beneath the chin of the mask allowed for convenient sipping of milkshakes through a straw, ensuring no beverage cravings went unfulfilled while in costume.
Easily attainable, black “opera” gloves possess an otherworldly aura, gracefully adorning your hands.
Place the intricately carved pumpkin atop your cranium, ensuring it snugly fits over your hood. Secure the rear portion, if applicable, using the bamboo skewers.
Final details.
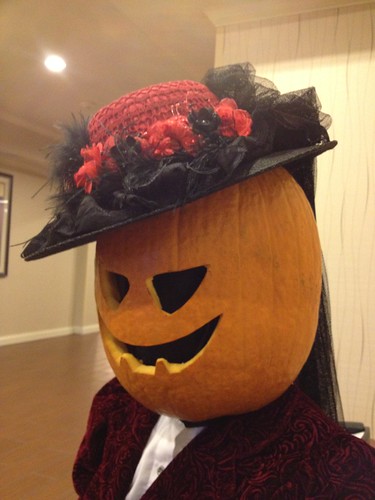
Choosing contrasting expressions for our pair of pumpkins was our decision – one exhibiting a mischievous yet joyful countenance, while the other portrayed a slightly more ominous visage. The addition of a simple accessory, such as a hat, possessed the remarkable ability to convey notions of gender or social standing. Securing the hat in position could be achieved through the use of hat-pins, skewers, or even staples. Surprisingly, a staple gun proved to be quite effective when adorning the pumpkin’s outer surface.
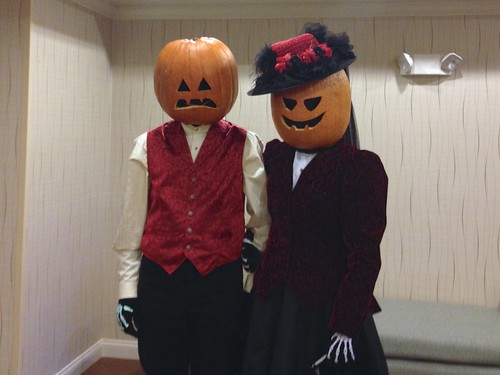
To complete the ensemble, the costume is beautifully complemented by retro-inspired attire, including eerie fingerless gloves with a skeletal design.
Delve into the realm of imagination with our extensive Halloween Project Archive, where an array of captivating costume projects await your discovery.