Game
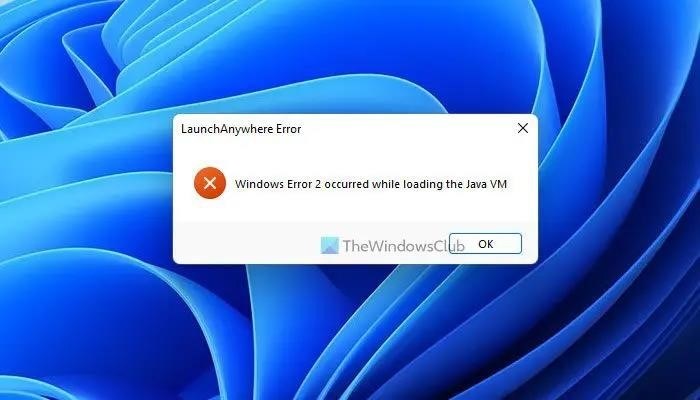
Windows Error 2 occurred while loading the Java VM
Jul
Encounter the pesky Windows Error 2 that arises during the loading of the Java VM when attempting to unveil the Launch Anywhere application on your trusty computer? Worry not, for here lies the remedy to bid farewell to this vexation. This predicament may rear its head with any Java edition, yet it is strongly advised to peruse these solutions meticulously in order to troubleshoot the quandary on your Windows 11/10 personal computer.

LaunchAnywhere, the ingenious Java application launcher, empowers you to effortlessly initiate a plethora of Java programs on your personal computer. It seamlessly retrieves the Java virtual machine, commonly known as the VM, to gracefully unveil the desired application on your PC. Nevertheless, should it encounter the aforementioned error, fear not, as the solutions lie within reach and are remarkably uncomplicated.
Follow these steps to resolve the Windows Error 2 that occurred during the loading of the Java VM.
Keep reading to delve deeper into these steps and expand your understanding.
1] Update Java.
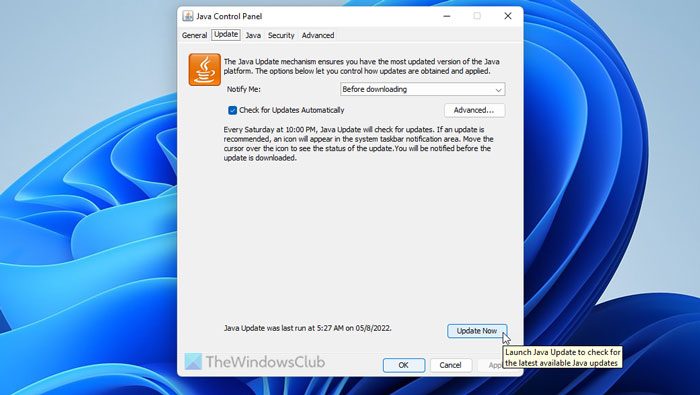
Updating Java to the latest version is the initial step when encountering the Windows Error 2 during the loading of the Java VM on your computer. While the automatic update feature is usually reliable, it may occasionally falter when dealing with metered internet connections. Hence, it is advisable to ensure that Java is up to date on your computer.
Follow these steps to successfully update Java on your Windows 11/10 operating system.
In case there is no update accessible or you already possess the most recent edition, you can explore additional tips and techniques listed beneath.
2] Erase the Java Environment Variable.
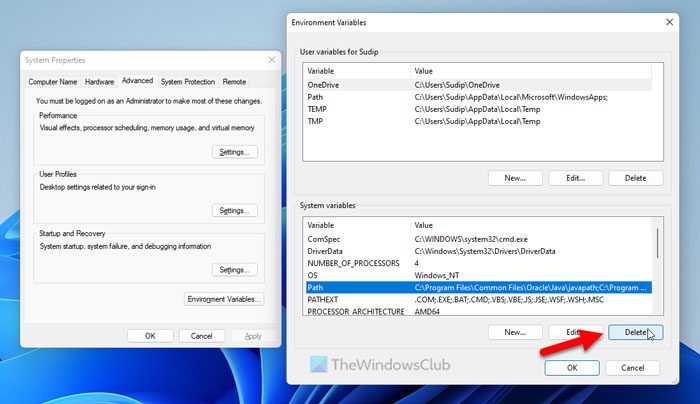
Upon installation of Java on your computer, it seamlessly incorporates an Environment Variable. Nevertheless, should the pathway become erroneous, it would be deprived of the customary Windows environment which facilitates command execution for any program. Consequently, you have the ability to remove and restore this pathway on your personal computer.
To achieve this, follow these steps:
Afterward, give your computer a fresh start to witness the transformation.
3] Enhance and customize the PATH variable.
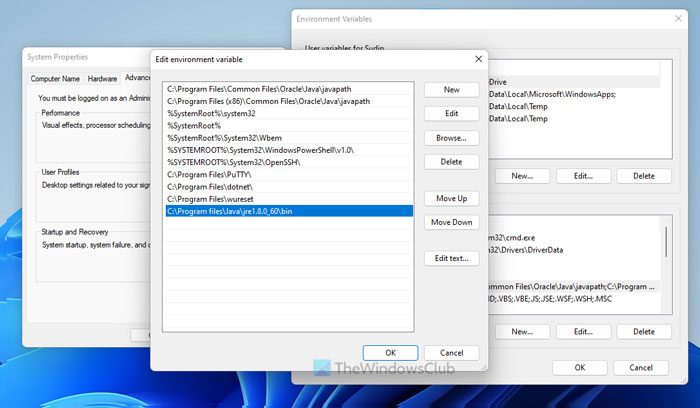
Discover the pathway to enhance or alter the Java PATH variable in the mesmerizing realm of Windows 11/10 by embarking on these ingenious steps:
In conclusion, verify whether or not you encounter the identical problem. Furthermore, it is imperative that the previously mentioned pathway aligns with the initial Java installation directory on your personal device.
Explore: Unveiling the Secrets of Enhancing or Modifying a PATH Environment Variable in Windows.
4] Execute the installer using the powerful LAX_VM.
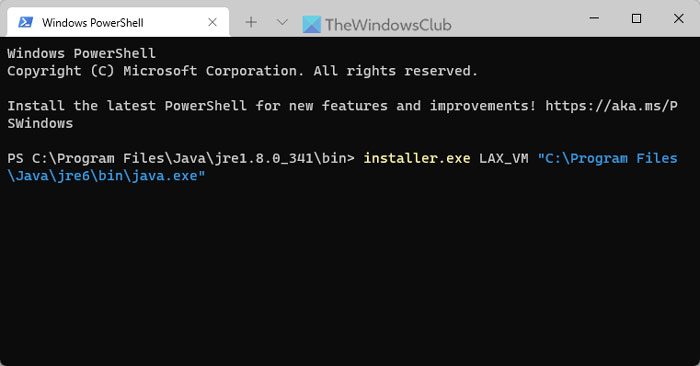
The utilization of the LAX_VM parameter enables the execution of the installer using Java VM. Consequently, you may attempt utilizing this command in order to resolve the issue at hand:
Ensure that Java is properly installed in the C drive with the correct path mentioned earlier. Yet, if an alternate folder exists, you must substitute it with this one. Additionally, the version on your computer may vary.
Encounter: Java Virtual Machine Launcher Blunder, Failed to generate the Java Virtual Machine.
How do I fix Windows error 2 occurred while loading the Java VM?
To resolve the Java VM error (Windows Error 2) that arises while loading on Windows 11/10, one can either modify or append the PATH variable. Alternatively, it is possible to manually delete the current PATH variable and add a new one. Moreover, the installation can be facilitated by utilizing the LAX_VM parameter.
How do I fix error code 2 in Java?
In order to resolve Error code 2 within the Java VM, embark upon the aforementioned suggestions and techniques. Begin by ensuring that your Java version is up to date and verify if the issue is merely a temporary malfunction or a software bug. Should this approach prove ineffective, you have the option to append or alter the PATH variable. Subsequently, employ the LAX_VM parameter as a means of rectifying the problem.
That’s a wrap! Fingers crossed these ingenious fixes did the trick for you.
Encounter: The Java Installation or Upgrade was unsuccessful – Error Code 1603.
Anand Khanse holds the esteemed position of being the Admin of TheWindowsClub.Com, serving as a Microsoft MVP for an impressive period of 10 years (2006-2016) and currently recognized as a Windows Insider MVP (2016-2022). Prior to proceeding, we kindly request you to thoroughly peruse the entirety of this post along with its accompanying comments. Additionally, it is strongly advised to create a System Restore Point prior to implementing any modifications to your system. Lastly, exercise utmost caution when encountering any third-party offers during the installation process of freeware.