Diablo
How to Play Diablo 4 on Steam Deck the Easy Way
Jul
The Steam Deck pleasantly handles Diablo 4 with remarkable performance, despite the game’s absence on the Steam platform. Getting the game up and running is a breeze, ensuring a seamless experience.
The procedure remains identical to my ingenious approach for operating Overwatch 2 on the remarkable Steam Deck. However, in place of Overwatch 2, you effortlessly substitute it with Diablo 4. It’s a straightforward matter, truly.
Discover the art of installing Diablo 4 on the remarkable Steam Deck, even if you haven’t yet experienced the wonders of Battle.Net. Embark on a journey illuminated by vivid visuals, as we present a step-by-step installation guide accompanied by captivating illustrations.
Step 1: Boot into Desktop Mode
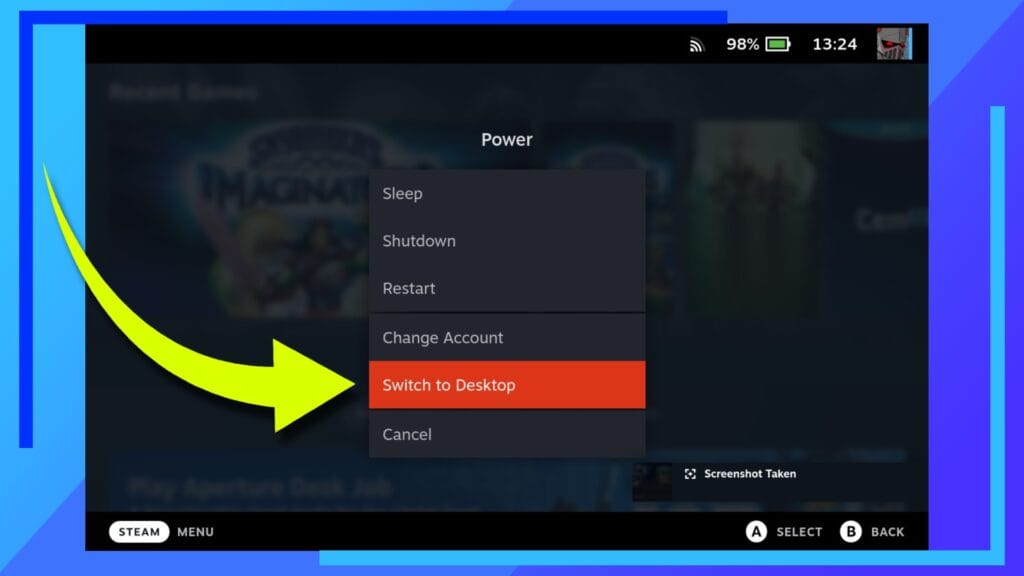
As per my usual guides, let’s kick off by initiating Desktop Mode. Fire up the Steam Deck like you normally would, and once it’s fully loaded, press and hold the Power Button until the aforementioned menu pops up. In this menu, simply click on the option that says Boot to Desktop.
Once a few fleeting moments have passed, the Steam Deck shall awaken, immersing you into a captivating Linux-powered realm of desktop aesthetics.
Step 2: Download Battle.net
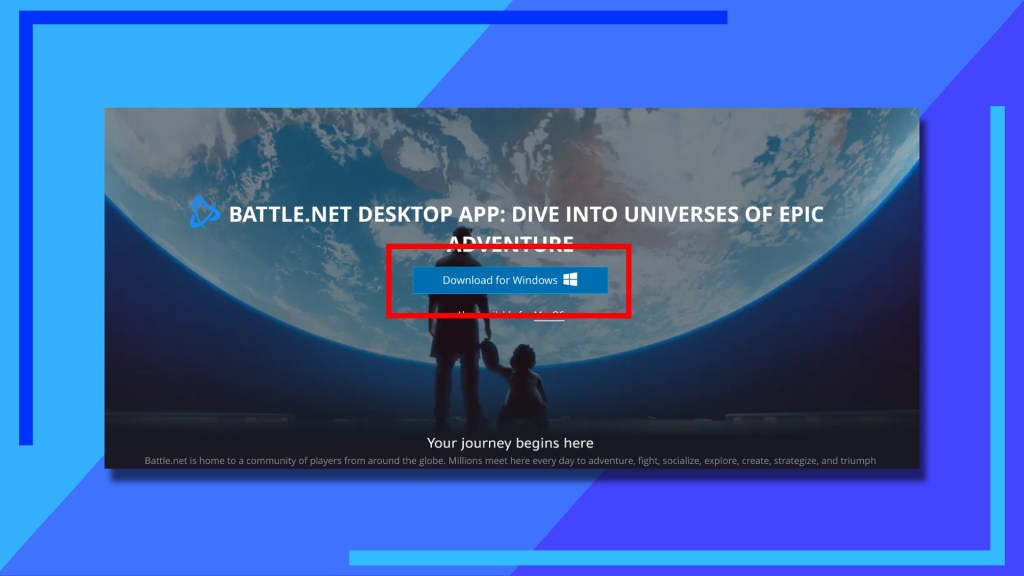
In order to experience the thrill of Diablo 4 on the Steam Deck, acquiring Battle.Net becomes imperative. Let us embark on a journey to the realm of Battle.Net’s website where the magical installer file awaits.
Once the page is fully loaded, a colossal download button will catch your attention. A single click on it will initiate the automatic download of the installer to your Steam Deck.

Having obtained the installer file, our next endeavor involves devising a method to execute it. Our solution entails incorporating it into Steam as a non-Steam game.
Venture into the realms of the Dolphin File Explorer, guided by the beckoning call of the celestial blue folder icon. Embark on a journey through the labyrinthine corridors of the Downloads folder, where the coveted relic of the Battle.Net installer patiently awaits your arrival.
Employ the left trigger to initiate a click on the installer, and within the ensuing sub-menu, employ the right trigger to select the option of adding it to Steam.
In a fleeting moment, a diminutive emblem of Steam will materialize. After its departure, you can rejoice in the triumphant addition of the installer to your Steam library.
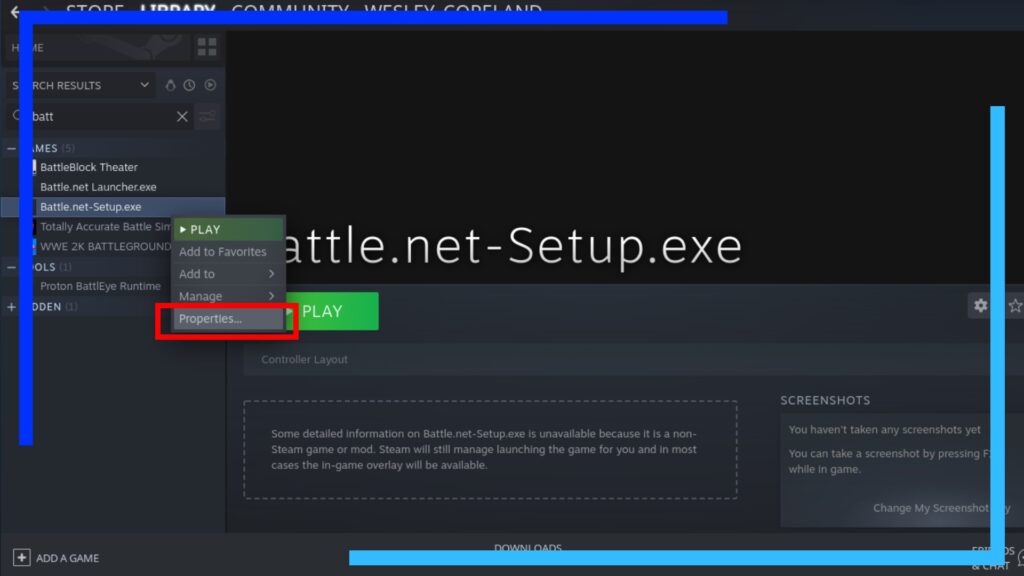
Launch the primary Steam application and navigate to the Library section. Observe the search bar located in the top left corner of the window. Directly click on it. In case the keyboard fails to appear, simply press the X button to summon it.
Input: Now, input the word “Battle” into the search field and press the enter key on your keyboard to initiate the search. Subsequently, the Battle.Net installer will manifest in the search outcomes underneath.
Press the left trigger next to the name to unveil the sub-menu, where you will find a variety of choices. Among these choices, you will discover the option labeled “Properties”. Select it promptly.

Now, let’s embark on our journey to fine-tune the installer, enabling its seamless compatibility with the remarkable Steam Deck.
Begin the journey by tapping on Compatibility (1.) To unveil an array of intriguing possibilities. Adjacent to this lies a checkbox (2.). Engage with it to mark the box and compel the utilization of a distinct Steam Play compatibility tool. Afterwards, explore the dropdown menu below to handpick the cutting-edge Proton version.
Take heed of the procedure, for we shall revisit it in due course. Furthermore, in the event that the most recent iteration of Proton fails to function, consider employing Proton 7.0-5 as an alternative.
Step 4: Install Battlenet

Simply tap on the X located at the upper-right corner of the window to bid farewell and return to your Library.
Rediscover the Battle.Net installer and unleash your inner warrior by tapping that colossal Play button. Grant it a brief moment to initiate and witness the installer file spring into action.

Discover the joy of customizing your Battle.Net installation location! Take a moment to consider the perfect spot for its placement. Should you skip this step, the esteemed Battle.Net launcher might end up in an unremarkable folder, potentially causing inconvenience when you try to locate it in the future.
To steer clear of this predicament, I suggest altering the designated route of installation to any of the subsequent alternatives.
Opt for this route if you wish to install Battlet.Net and Diablo 4 onto an SD card.
/Run/media/mmcblk0p1/CreateAFolderHere.
Alternatively, if you aspire to indulge in gaming adventures directly from the internal SSD, opt for this particular route instead:
/Home/Deck/MyGames/CreateAFolderHere.
After the installation of Battle.Net is complete, venture into the folder where you have installed it and incorporate the primary Battle.Net Launcher.Exe file as a non-Steam game. Return to Steam and utilize the search box to locate this file, just like we did before with the installer.
Discover it, venture into Properties, check the box, and proceed to incorporate a remarkable Proton edition from the captivating drop-down menu.
Contrary to the claims made by other websites, the most recent releases of Proton tend to be unreliable. My personal experiences have shown that they often encounter a frustrating issue where they become unresponsive at the main character selection screen. To overcome this, I highly recommend opting for Proton-GE and embracing the remarkable GE-Proton7-51.
Using that particular version, I successfully loaded, logged in, and chose the characters I had been enjoying on different platforms. It functions flawlessly, hence it is advisable to steer clear of the standard Proton versions if you wish to avoid any unnecessary troubles.
Congratulations on completing the challenging portion! However, there are still some hurdles to overcome. With the continuous development of Proton, these issues are likely to be resolved. Nevertheless, in case you find yourself in a situation where they haven’t been addressed yet, here are a few helpful suggestions.
If you encounter any issues with the Steam Deck on-screen keyboard preventing you from entering text during the login process, simply return to Gaming Mode and attempt launching the primary Battle.Net application from there. By following this approach, I was able to successfully access the on-screen keyboard by simultaneously pressing the Steam and X buttons, resulting in the desired functionality.
There is a possibility that performing this action could encounter an issue preventing the pressing of the Diablo 4 installation button. However, after logging in and selecting the option to remember your login information, you can proceed to restart your system in Desktop Mode, thereby restoring the functionality of the installation button.
Furthermore, upon launching Diablo 4 in gaming mode, the controls will automatically switch to gamepad, rendering the cursor immobile for clicking on various elements, such as the Play button. However, to overcome this limitation, simply press and hold the Steam button while manipulating the right thumbstick to summon the cursor and navigate freely.
Step 5: Install Diablo 4 on Steam Deck

With all said and done, we are now in the clear to proceed and embark upon the installation of Diablo 4 on the magnificent Steam Deck.
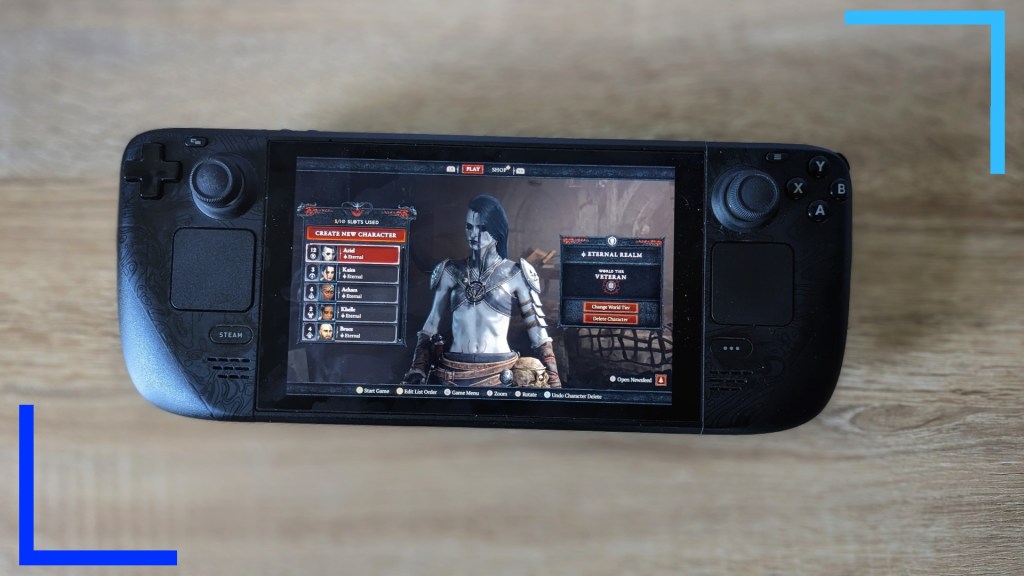
Load up Battle.Net, embark on an exhilarating journey by clicking on the captivating icon of Diablo 4, and unleash your gaming prowess as you triumphantly press the grand Install button. Allow the enchanting on-screen instructions to guide you through a mystical process, and witness the mesmerizing transformation as Diablo 4 gracefully descends upon your esteemed Steam Deck. Behold, a captivating visual awaits you, as I present to you a captivating snapshot of Diablo 4 gracing my very own Steam Deck.
Rewritten The HD assets available for download on the Steam Deck are not something I found necessary to pursue. Considering the device’s output limitation to 800p, it seemed futile. Moreover, these assets would inflate the file size from 40GB to 80GB, without offering enough value to justify the extra storage space. However, if you have a preference for them, feel free to obtain them.
So, go forth and indulge in the captivating realm of Diablo 4. Surprisingly effortless, don’t you think?