Diablo
Diablo 3 Season Journey Guide Season 28

Jul
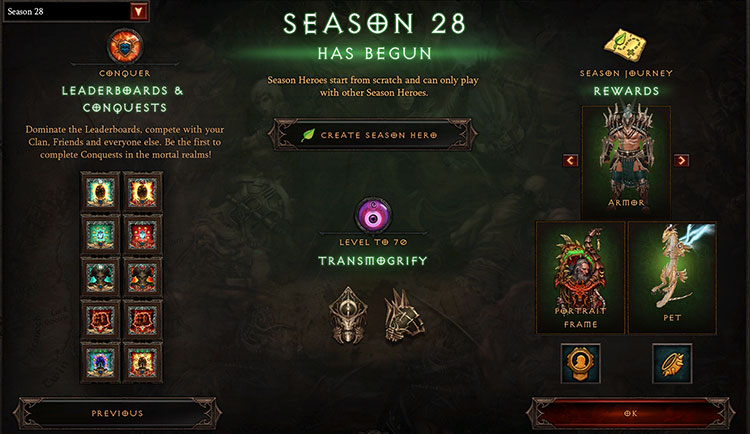
As Season 28 approaches, anticipation fills the air, for it brings with it yet another Season Journey to conquer! Within this guide, we shall unveil the essence of the Season Journey and unveil the path to obtaining its splendid rewards. To embark on this adventure, simply navigate to the progress tab on the Main Menu screen or click the Map Icon located in the upper right corner of your interface while in-game. Keep in mind, this odyssey can only be undertaken once per region, per Season, yet the bountiful rewards that await make it a venture well worth your while. The Season Journey acts as a marvelous catalyst, propelling your Season forward, as it provides a solid foundation for character growth, ultimately granting the player a complete 6 piece Class Set upon completion of the initial 4 Chapters.
As you progress through your Season Journey, you’ll come across Chapters II, III, and IV which offer an exciting reward known as Haedrig’s Gift. This is the ultimate goal for most players undertaking the Season Journey. Once you’ve earned this special gift, it will be conveniently delivered to your Mailbox. Inside, you’ll find 2 items specifically tailored to enhance your chosen Class set. The first 2 items can be acquired effortlessly, yet their impact on certain classes is truly remarkable. However, if you manage to obtain all 3 gift bags, you’ll unlock the complete Class Set. This achievement will pave the way for your character to reign supreme as you progress onward. In Season 28, Haedrig’s Gift will feature the following sets for each Class.
With every passing season, the Class Set undergoes a delightful rotation, bringing forth a plethora of sets for players to explore. Occasionally, a specific Class may bask in the glory of a formidable Haedrig’s Gift Class Set during certain seasons, but alas, this season they all pale in comparison. The true nature of Haedrig’s Gift remains concealed until the moment of unveiling, allowing players to gather these gifts and unlock their treasures using a different character, should they so desire. It is truly an extraordinary opportunity to equip a second character with the spoils of this endeavor, provided one can conquer this segment of the Journey without the need for the Set items themselves!
When you take a step back and observe the Season Journey in its entirety, you’ll notice a plethora of Objectives scattered throughout multiple Chapters that complement each other quite well. For instance, you’ll discover that it’s necessary to dedicate a significant amount of time to traverse Acts I-V, engaging in Bounties, eliminating Bosses, and tracking down Keywardens. Some of these objectives can be easily accomplished at lower difficulty levels, offering valuable rewards early on for your progression. However, if you’re capable of increasing the difficulty to Torment IV+ right from the start, you can tackle numerous objectives in a single round of Bounties, successfully eliminating all Bosses and Keywardens in the process. It’s important to keep in mind that while you have the freedom to complete these objectives at any given time during your Season Journey, you must fulfill all the objectives within a Chapter before unlocking rewards from the following chapter.
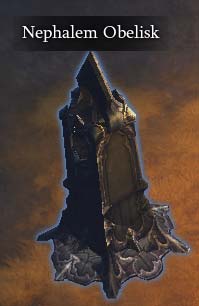
Chapter I is the simplest of them all, with straightforward objectives. As mentioned earlier, this is where Bounties and Bosses become mandatory. If you’re strong enough, you can explore later Chapters to enhance your efficiency. For instance, Chapter II demands 2 Boss kills on Hard Difficulty, while Chapter III requires 2 other Bosses on Master Difficulty or above. By starting on Master Difficulty, you can fulfill all Bounty and Boss requirements for the first 3 chapters in one go. Remember to consider these factors while reviewing all the objectives. If you’re unfamiliar with Nephalem Rifts, they are dungeons accessed through the Nephalem Obelisk found in every town. The first 3 Chapters necessitate clearing one of these each time; however, if you begin on a higher difficulty, the previous ones will also be completed.
| OBJECTIVE | REQUIREMENTS |
| Complete a Nephalem Rift | While on Normal difficulty or higher |
| Complete 5 Bounties | Complete any 5 Bounties on at least Normal difficulty Do them all in the same Act to get a Bounty Cache from Tyrael |
| Socket 5 Gems into your gear | Possible sockets include Helm (1), Chest (3) and Pants (2) |
| Raise the Blacksmith to level 10 | Level up the Blacksmith in town to level 10 |
| Raise the Jeweler to level 10 | Level up the Jeweler in town to level 10 |
| Raise the Mystic to level 10 | Level up the Mystic in town to level 10 |
| Kill a Boss (Check in game) | Any Difficulty |
| Kill a Boss (Check in game) | Any Difficulty |
| Reach level 50 | Slay Demons |
Don’t stop, just keep moving forward!
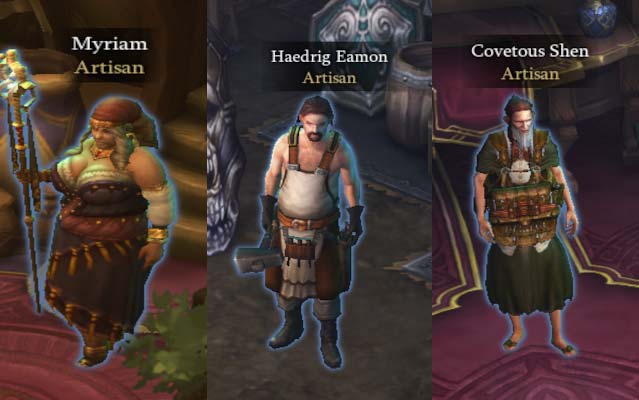
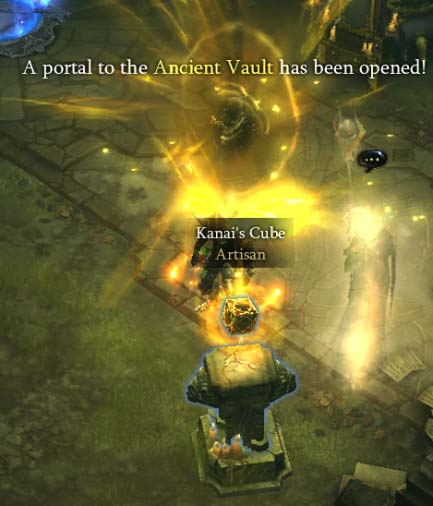
In Chapter II, the spotlight is on getting to know the Artisans in town and discovering the endless possibilities of the Jeweler, Blacksmith, and Mystic in creating and enhancing your gear. Your mission entails defeating two challenging Bosses on Hard difficulty and conquering a Nephalem Rift on Expert level. If you haven’t obtained Kanai’s Cube yet, now is the perfect time to embark on a slightly lengthy journey. Keep pushing forward and you will stumble upon the Elder Sanctum nestled within The Ruins of Sescheron. Once inside, venture all the way to the end and you won’t be able to miss it!
| OBJECTIVE | REQUIREMENTS |
| Complete a Nephalem Rift | While on Expert difficulty of higher |
| Craft a level 70 Weapon or Armor piece | Use the Blacksmith in town |
| Fully equip one of your followers | Can utilize Blacksmith & Jeweler for crafting items |
| Raise the Blacksmith, Jeweler & Mystic to level 12 | Will need Death’s Breath (dropped form Elites) to do this. |
| Find Kanai’s Cube | Hidden in the Elder Sanctum which is within The Ruins of Sescheron in Act III |
| Reach level 70 | Slay Demons |
| Kill a Boss (Check in game) | Must be level 60 or higher and on at least Hard difficulty |
| Kill a Boss (Check in game) | Must be level 60 or higher and on at least Hard difficulty |
| Craft a level 70 Ring or Amulet | Use the Jeweler in town |
| Replace a property by Enchanting at the Mystic | Use the Mystic in town to replace an undesirable affix on an item |
| Transmogrify an item at the Mystic | Change the appearance of an item using the Mystic in town |
Behold the glorious Haedrig’s Bounty – a magnificent Class Set Helm & Gloves! Rejoice, for you have unlocked the wondrous power of the 2 piece Class Set bonus.
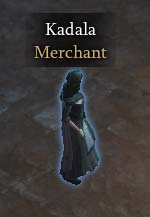
Within this chapter, the Nephalem Rifts and their formidable Bosses must be conquered on Master difficulty or beyond. Prepare yourself to encounter Kadala and embark upon Greater Rifts, where the thrilling opportunity to gamble with Blood Shards awaits. These valuable shards are obtained from the Guardians of Greater Rifts. Seek out Kadala, conveniently located near the Nephalem Obelisk in every town. Utilize Blood Shards to acquire the missing pieces of your gear, but remember that there exists the possibility of disappointment. Conquer challenging Greater Rifts to expand your capacity for storing Blood Shards, with a bonus of +5 for each level achieved. Master difficulty presents a reasonable challenge in the early stages of the game and serves as an excellent starting point. However, it is worth considering progressing to Chapter IV and Torment I, as they offer a slight increase in difficulty and enhance the efficiency of our endeavors, especially when playing alongside a group.
Behold! The wondrous Haedrig’s Gift has bestowed upon you a splendid pair of Class Set Boots and Shoulders. Lo and behold, the time has come for you to revel in the glory of your 4 piece Class Set bonus.
Chapter IV is where you obtain the final fragments of your Class Set through Haedrig’s Gift. However, this is also the point where things start to become more challenging! With four pieces of your Class Set, you are now equipped to tackle higher difficulties and face new obstacles. To excel in your solo level 20 Greater Rift, refer to Wudijo’s guide for insights on how to optimize your current four-piece set bonus and effortlessly conquer this objective. Additionally, you must locate the four Keywardens scattered across Acts I-IV. While these fights may not be excessively difficult, you must search for them within their designated areas. By now, you have likely come across some Blacksmith and Jeweler Recipes through the completion of Bounties. It is possible that you have already learned five of each, but if not, consider completing another full act of Bounties to obtain a substantial number of recipes in the Bounty Cache.
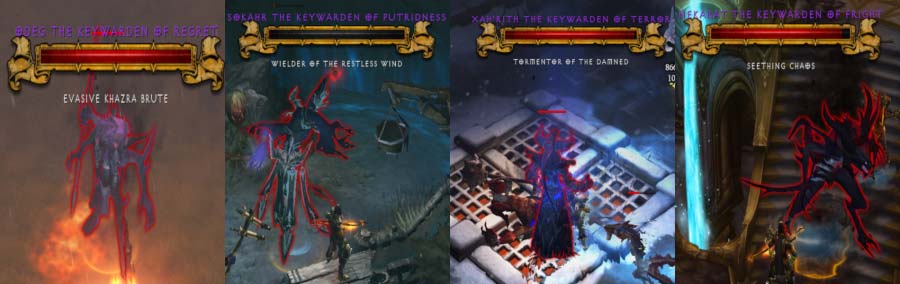
During the Slayer Objectives, you will have a thrilling encounter with the Infernal Machine’s (Infernal Machine of Regret, Infernal Machine of Putridness, Infernal Machine of Terror, Infernal Machine of Fright) for the very first time. These remarkable artifacts unlock extraordinary dungeons within the Heretic’s Adobe in Act I. Inside these dungeons, you will face off against the formidable Bosses, now referred to as “Ubers,” who have been empowered and joined forces to challenge you in battle. Defeating the Ubers presents an opportunity to acquire a Demonic Organ (Leoric’s Regret, Vial of Putridness, Idol of Terror, Heart of Fright), which become increasingly abundant as the difficulty level escalates.
| OBJECTIVE | REQUIREMENTS |
| Complete a level 70 Nephalem Rift | Must be on Torment V difficulty or higher |
| Level one Legendary Gem to level 25 | Legendary Gems drop from Rift Guardians in Greater Rifts Speak to Urshi at the end of a Greater Rift to upgrade them |
| Slay The King of the Dead and The Merciless Witch in the Realm of Regret | Must be level 70 or higher and on at least Torment I Difficulty Open the Infernal Machine of Regret which drops from Odeg the Keywarden in the Fields of Misery, Act I |
| Slay The Vile Executioner and The Foul Desecrator in the Realm of Putridness | Must be level 70 or higher and on at least Torment I Difficulty Open the Infernal Machine of Putridness which drops from Sokahr the Keywarden in the Dahlgur Oasis, Act II |
| Obtain a Legendary item by spending Blood Shards | Gamble Blood Shards with Kadala until you find a Legendary item |
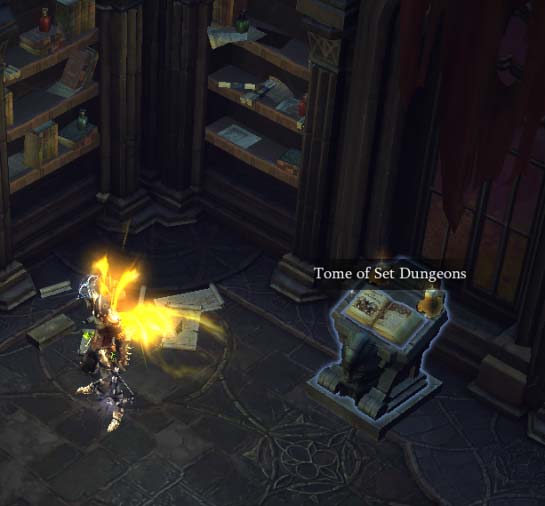
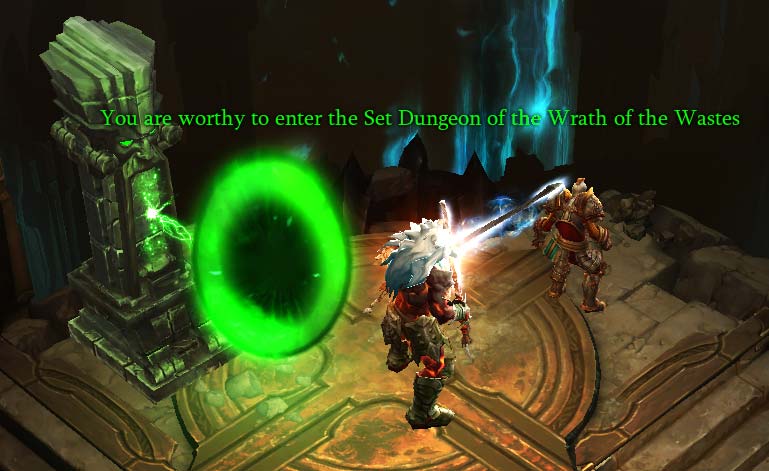
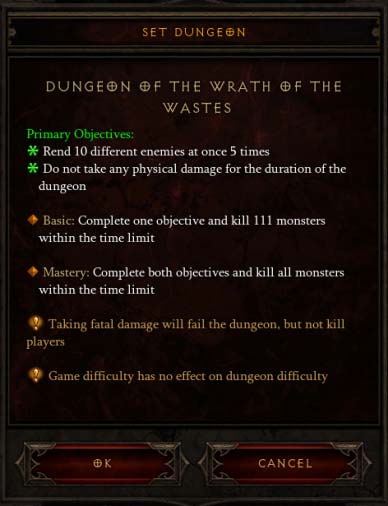
| Complete any Set Dungeon | While utilizing a 6-piece Class Set bonus use the Tome of Set Dungeons in Leoric’s Manor for a clue that will lead to the Set Dungeon’s entrance |
| Kill a Boss (Check in game) | Must be level 70 and on Torment VII or higher |
| Kill a Boss (Check in game) | Must be level 70 and on Torment VII or higher |
| Reach Greater Rift level 30 Solo | Find Greater Rift Keystones from Rift Guardians in Nephalem Rifts Use a Greater Rift Keystone at the Obelisk in town |
| Equip Kanais Cube with a Weapon, Armor and Jewelry Legendary Power | Must fill all 3 slots on the same character |
The Slayer objectives will also introduce you to the fascinating world of Set Dungeons. These dungeons are specifically designed to showcase the unique Class Sets in the game. Each class has four different Set Dungeons, each with its own set of challenges and restrictions that add an element of excitement and difficulty to the gameplay. To discover the entrance to a Class Set Dungeon, you must equip the corresponding Class Set and visit the Tomb of Set Dungeons, which can be found in the Royal Quarters within Leoric’s Manor. The completion of Set Dungeons does not guarantee any special item drops or crafting opportunities. However, if you can master 24 out of the 28 Set Dungeons (excluding the Necromancer), you will be rewarded with the incredibly stylish and sought-after “Wings of Mastery,” which are considered the coolest cosmetic wings in the entire game.
Portrait Frame…
Input: So you think you’re a Champion? Well you’re going to have to prove it with this set of objectives before moving on to the next step on your Season Journey. Here you’ll have arguably your hardest task of Mastering any Set Dungeon, some are easier than others but they all offer a challenge. To be a Champion also means you must craft a Flawless Royal Gem which will require you to find the recipe and it costs 81 Marquise Gems to create. Make sure you’re always picking up Gems once they’re dropping at Marquise and Imperial quality as you’ll need quite a few to have all max level Gems in your gear.Do you dare consider yourself a Champion? Prepare to demonstrate your worth by completing this array of objectives before advancing to the subsequent stage of your Season Journey. Within this realm lies your most formidable trial—Mastering any Set Dungeon. While some may be more manageable than others, they all present a formidable challenge. A true Champion must also possess a Flawless Royal Gem, an elusive creation that demands the discovery of its recipe and a hefty sum of 81 Marquise Gems. Be ever vigilant in collecting Gems of Marquise and Imperial caliber, for a multitude will be required to adorn your gear with an abundance of maximum level Gems.
| OBJECTIVE | REQUIREMENTS |
| Complete a Nephalem Rift | Must be level 70 and on Torment X or harder Nephalem Rift has to be completed within 6 minutes |
| Level 3 Legendary Gems to 35 | Legendary Gems drop from Rift Guardians in Greater Rifts Speak to Urshi at the end of a Greater Rift to upgrade them |
| Craft a Flawless Royal Gem | Must find this recipe from Bounty Cache’s or Goblins |
| Slay The Soul of Evil in the Realm of Fright | Must be level 70 or higher and on at least Torment X Difficulty Open the Infernal Machine of Terror which drops from Nekarat the Keywarden in the Gardens of Hope 2nd Tier, Act IV |
| Slay The Savage Behemoth and The Undying One in the Realm of Terror | Must be level 70 or higher and on at least Torment X Difficulty Open the Infernal Machine of Fright which drops from Xah’Rith the Keywarden in Stonefort, Act III |
| Master any Set Dungeon | Completion is one thing but Master is another, you got this! |
| Kill a Boss (Check in game) | Must be at level 70 and on Torment X or higher |
| Kill a Boss (Check in game) | Must be at level 70 and on Torment X or higher |
| Reach Greater Rift level 40 Solo | Find Greater Rift Keystones from Rift Guardians in Nephalem Rifts Use a Greater Rift Keystone at the Obelisk in town |
| Convert a Set item with Kanais Cube | Use the “Skill of Nilfur” Recipe in Kanais Cube to convert a Set Item (Recipe #4) |
Portrait Frame…
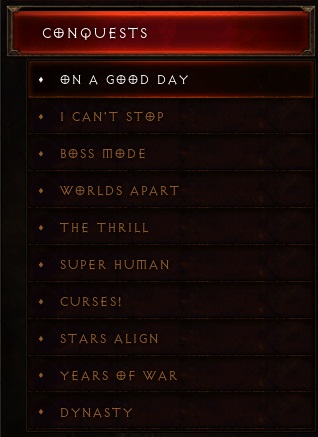
Now that you’ve ascended to the esteemed title of Champion, prepare yourself for an extraordinary new test unlike any you’ve encountered before. Conquests, known as the epitome of Season Challenges, present themselves with individual Leaderboards. Within this chapter, you shall embark on a quest to conquer one of these extraordinary trials. To discover these Conquests, consult our comprehensive Conquests Guide or simply navigate to the Leaderboard Menu in-game. The list of Conquests featured on the right showcases the five available options each Season, with both Softcore and Hardcore variations.
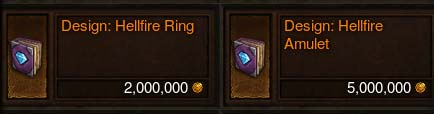
Now is the moment to unleash the power of the Demonic Organs you have acquired. Additionally, you must obtain the Design: Hellfire Amulet from Squirt in Act II and acquire the knowledge and skills to craft this powerful amulet at the Jeweler’s workshop. As you progress through this chapter, you will notice a sense of familiarity. The upcoming tasks in the Season Journey will bear striking resemblances to what you have already accomplished. Finally, brace yourself, as Torment XIII will be the ultimate challenge you must conquer to complete these objectives.
Portrait Frame…
As you embark on the penultimate step of the Season Journey, brace yourself for an array of thrilling tasks. These include the mystical art of reforging a Legendary item, enhancing your very first Ancient Legendary item, and embarking on a daring expedition to The Vault to vanquish the notorious Greed. The process of reforging Legendary items is no small feat, for it demands a hefty price. Only those seeking a chance at acquiring a superior item should dare to undertake it. This endeavor may even yield the fabled Ancient and Primal Ancient items, but be warned, the cost is astronomical. Reserve this technique for the Season Journey, and save it for a later stage in the season when you find yourself in dire need of that elusive final piece of extraordinary equipment, such as the legendary Primal Horadric Hamburger.
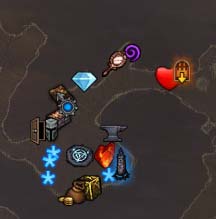
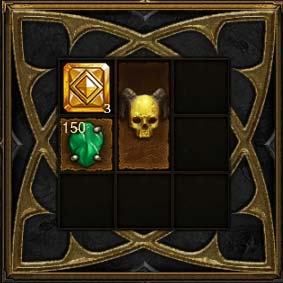
Caldesann’s Despair, also known as Recipe #10 in Kanai’s Cube, offers a brilliant method for enhancing your power when you stumble upon a remarkable piece of gear worthy of your investment. However, acquiring an abundance of Legendary Gems to use for Augmentation requires a considerable number of Greater Rifts, so it is crucial to employ this recipe wisely on your finest Ancient Legendary items. The process itself is relatively straightforward: you simply place the Ancient Legendary, Legendary Gem, and the corresponding Gem that grants the desired Primary Stat into the cube. By utilizing a Flawless Royal Ruby, you will obtain Strength; a Flawless Royal Emerald will grant Dexterity, while a Flawless Royal Topaz will result in Intelligence. Once you have arranged Kanai’s Cube to resemble the image on the right, a single click on Transmute will provide a significant boost to the Ancient Legendary’s Primary Stat, thereby adding an extra Primary attribute.
Portrait Frame… and +1 Stash Space
Embark on the epic Season 28 Guardian Expedition to unlock the ultimate portrait frame and adorable companion!
Kudos to you for reaching this milestone! You have successfully finished your Season Journey and earned Haedrig’s Gift, along with portrait frames, a stash tab, and some adorable Pets! These exclusive cosmetics are a testament to your triumph in Season 28 and will serve as a symbol of your glory as you embark on the next Season. Your remarkable achievement will surely be the envy of many, as nobody can deny your greatness. If you’re seeking further challenges beyond the Season Journey, be sure to explore the thrilling Season Conquests.
Crafted by Facefoot, meticulously evaluated by Raxxanterax.